Showing posts with label freezable. Show all posts

Tuesday, December 14, 2010

Crock Pot Chicken Soup

CROCKPOT CHICKEN SOUP

This is the Second recipe for Soup Week!  You can see the first recipe HERE.  You can also still link up to Saturday's Party HERE.

 I'm a creamy soup person.  I'm more than happy to admit it.  I don't care much for chili's, stews, "dark" soups.  I think my mind has connected creamy soups=cheesy goodness  dark soups=spicy.  I have a hard time with hot spices, I just can't handle the heat.

This soup, however, had just enough heat for me.  You could even amp up the heat factor depending on what type of salsa you used.  I used a salsa verde, since that's what I had on hand.  The nice thing about this soup, besides throwing everything in the crockpot and leaving it, is the options for eating.  You can scoop the soup and eat it with the chips, you can crush the chips up and mix them in with everything (my favorite), you can forgo the chips completely and just eat the soup!  AND it freezes up nicely.  Always a plus in my book!

CROCKPOT CHICKEN SOUP
Posted at: http://recipesofacheapskate.blogspot.com
Adapted from: sisterscafe.blogspot.com
  • 3 chicken breasts
  • 2 15-oz cans black beans, drained
  • 3 15-oz cans diced tomatoes
  • 1 cup salsa
  • 2 4-oz cans chopped green chilies
  • 1 14 ½-oz can tomato sauce
  • 3 cups grated cheddar cheese, for topping
  • Tortilla chips, for topping
  • Sour cream, for topping
Combine all ingredients except chips and cheese in large slow cooker. Cover and cook on low 6 hours. During the last 1/2 hour of cooking, remove chicken breasts and slice or shred into bite-sized pieces. Stir into soup. Serve with cheese, chips, and sour cream.  Freeze leftovers.

(Linked up at: Tempt my Tummy Tuesday, Tuesday Night Supper Club, Tuesdays At The Table, )

Photobucket

Thursday, December 9, 2010

Stuffed Shells With Pesto

STUFFED SHELLS WITH PESTO

(Still time to link up to Saturday's Party!  See link HERE.)


This is adapted from one of my favorite recipes, and I love the way it turned out! This dish can take some time to prepare, so keep that in mind.  BUT, it's also a dish you can prepare ahead of time, and leave in the fridge for the day.  I also threw a pan in the freezer, since this was my first time preparing this dish as shells, I ended up with extra of everything I had to do something with!  As I have it written though, it should work out pretty close to a 9x13 pan size. 

See that gooeyness?  Wonderful!

STUFFED SHELLS WITH PESTO
From: http://recipesofacheapskate.blogspot.com
  • 1/2 pkg jumbo shell pasta, cooked
  • 16 oz ricotta cheese
  • 2 chicken breasts, cooked and diced/shredded
  • 1/2 pkg (7oz pkg) pesto
  • 1 can alfredo sauce--I use Ragu, which is 1lb
  • 1/2 pkg frozen spinach, thawed and drained
  • 2-3 cups mozzarella cheese
  • extra 1/2-1 cup cheese for topping
In one bowl, mix together the cooked chicken, spinach, ricotta and mozzarella cheese.  In another bowl, mix together the pesto and alfredo.  Spoon mixture into the cooked and cooled shells.  Put some of the sauce in a 9x13 pan, add the shells, and cover with the rest of the sauce.  Sprinkle with cheese, and bake in a preheated 350deg oven for about 30-45 minutes, until brown and bubbly, and hot in the middle.

(Linked up at: Friday's Potluck, )

Photobucket

Friday, December 3, 2010

Pulled Pork Sandwiches and Saturday's Party

PULLED PORK SANDWICHES

I'm better this week, but still getting back into the groove of things.  It's always hard being sick on a holiday isn't it?  And kind of not fair either. So i wanted to make sure I had this post going early!!

My kitchen is also almost cleaned up from Thanksgiving, finally!

This recipe is perfect for those large crowds you might be expecting this holiday season.  You can cook it overnight, and have it ready to go!  It also freezes and reheats quite nicely, if you happen to have any leftovers.  We usually don't.  The nice thing about this recipe, is the option to flavor it with way you want.  You can use any type of barbecue sauce you want!  We made it last with a mango-chiplote sauce that Captain Jax just loves.  It was wonderful!

If you're feeling ambitious, you can lay slices of provolone cheese on top, and the broil the sandwiches to give them a nice crunch.  Either way, it's perfect with some cheese on top!

PULLED PORK SANDWICHES
Posted at: http://recipesofacheapskate.blogspot.com

  • boneless pork ribs-  estimate about 1/4lb per person
  • 1/2-1 bottle bbq sauce, depending on how saucy you like it (just the standard size bottles)
  • rolls/buns for serving
  • cheese for topping
Place the pork in the crockpot and cook for 8 hours on low heat. Shred the meat, add the sauce and cook for 2 more hours on low.  Serve over rolls with cheese.  You can add the cheese and broil for a crunchy sandwich.  Leftovers are freezable. Just divide into bags, label, and freeze!  Reheat in a pan on the stove, or even back in the crockpot.

Linked to: Friday Potluck, Recipe Swap Sunday, Potluck Sunday,

SATURDAY'S PARTY

Anything related to any type of a party is welcome!  It can be something you made yesterday, or last year.  The point is to share with others your creations that dwell in the realm of parties.

So here's the rules:

  • Please link to your original POST, not directly to your blog's homepage.
  • Anything pertaining to a party is welcome! Food, drinks, decoration ideas, theme ideas, etc.
  • Grab the Saturday's party button to add to your post, or link back to this post so others can come here and see the other great party ideas!
  • go check out the other bloggers and see what they made!  Who knows, you might find a new blog to follow!
Recipes Of A Cheapskate


Photobucket

Tuesday, November 2, 2010

Double Sauce Baked Ziti and Iron Foodie

DOUBLE SAUCE BAKED ZITI

After Baby M came home from the hospital, our local church members were so kind to bring us meals for a while as we got adjusted to FINALLY having him home, and dealing with all his medical equipment.  One of our neighbors brought this ziti dish over that was amazing!  I asked her for the recipe, and . . . never got it.  So I did my best to mimic it, and I think I did a great job!


With the tiny bit of alfredo sauce added into it, gives it just enough creaminess and extra flavor.  And another perk?  Freezable.  Yup, my kind of dish.  Covered in cheese and able to freeze. :)


DOUBLE SAUCE BAKED ZITI
Posted at: http://recipesofacheapskate.blogspot.com
  • 1 pkg ziti/rigatoni pasta
  • 1/2 jar red pasta sauce
  • about 1 cup alfredo sauce
  • grated mozzarella cheese
Preheat your oven to 350degs.  Boil your pasta.  When your pasta is finished cooking, drain and add your pasta sauce.  You want just enough to coat the pasta.  Spoon 1/2 the pasta into a 9x13 pan.  Spread the alfredo sauce in a very thin, thin layer over the pasta.  Sprinkle with mozzarella cheese, and then add the rest of the pasta.  Sprinkle with some more cheese and bake for about 30 minutes.

If you want to freeze, you can freeze as is, or prepare the dish in two 8x8 pans.  Freeze one and cook the other!

And now. . .my application for. . .

IRON FOODIE 

Iron Foodie 2010 | Here's Why that will be me:
MarxFoods.com -- Fine Bulk Foods The Foodie BlogRoll

Ala cuisine! 

Ok, so I'm not a Japanese man, who has a kitchen stadium.  Boy howdy, I love that show. 

However, Foodie Blog Roll, and Marx Foods have joined forces to bring to the world Iron Foodie 2010.  And I want to play. :)  Here is my official application:
  1. Why do you want to compete in this challenge?  My blog is titled "Recipes of a Cheapskate", and I don't often post recipes that involve high end or exotic foods.  The opportunity to expose myself and my readers to something high end would be quite the treat for all involved!
  2. Limitations of time/space notwithstanding, whose kitchen would you like to spend the day in & why?  Steven Raichlen of Primal Grill.  Oh boy, how I drool every time I watch that show! The fact that his kitchen is outside, and he deals with meat and fire.  That just makes my heart happy. 
  3. What morsel are you most likely to swipe from family & friends’ plates when they aren’t looking?  I'm honestly not a person who swipes from others.  I asked my husband what he thought, and he laughed and said he couldn't see me doing that.  But I love bread. . .especially cheesy garlic bread, or a chunk of crusty sour dough. 
  4. Sum your childhood up in one meal.  Sweet soup.  A warm mixture of home canned peaches, pears, cherries, apricots, and different spices.
  5. The one mainstream food you can’t stand? Squeeze cheese.  Yuck.  I wish they would get rid of it!
Photobucket

Thursday, October 7, 2010

Broccoli Chicken Rolls

 BROCCOLI CHICKEN ROLLS

Still time to link up to Saturday's Party!  See post HERE.

 In an (unsuccessful) attempt to get K-girl to like broccoli again, I made these rolls.  Imagine a cinnamon roll.  Only instead of cinnamon and sugar rolled up inside, it has broccoli, chicken, and cheese.  And instead of icing, more cheese.

That's this recipe in a nutshell. 

I saw a version of this recipe that used pepperoni and pizza sauce--Pizza Rolls.  But I had no pepperoni, so I gave these a shot.  They were good, and would make a nice lunch for a little tot.

 The price for these is pretty reasonable as well.

BROCCOLI CHICKEN ROLLS
Posted at: http://recipesofacheapskate.blogspot.com
  • 1 pkg frozen broccoli (about $1.50)
  • 1 cup shredded chicken (about 1 breast--I used leftover rotisserie chicken, about $1.50)
  • 2 cups shredded cheese (about $2)
  • 1 pkg pizza dough (about $2)
Roll out the pizza dough into a rectangle.  Mix together the defrosted broccoli, chicken, and most of the cheese.  Spread out on the dough.  Roll up and seal the edges.  Cut into 1-1 1/2 inch slices and place each roll in a greased muffin tin.  Sprinkle the top of each roll with cheese.  Bake at 350degs for about 20 minutes, or until they look done. :)

These are also freezable.  Just throw the leftovers in the freezer!  When you're reheating these, it's best to use the oven.  Using the microwave causes some sogginess issues that can make this rather unappetizing.

Photobucket

Wednesday, December 16, 2009

Lasagna Rolls

LASAGNA ROLLS

I understand that this picture might not look like a very appetizing meal. It was one of those "aw crap, I was blogging about this and forgot to take a picture of my plate!" pictures. But rest assured, this meal is very good, and very tasty. And freezable!

You start off with your basic lasagna mixture. Whichever one you always use. This is mine:
  • Ricotta cheese
  • Parm cheese
  • Mozzarella cheese
  • Egg
  • seasonings (salt, pepper, dried italian)
And you need to make a pasta sauce. This is my mother-in-law's recipe. It's awesome. You'll never want to buy another jar again. Well, you might, because this sauce has to cook ALL DAY LONG.
  • Tomato Paste
  • Tomato Sauce
  • Whole tomatoes
  • beef bouillon cubes
  • chicken bouillon cubes
  • onion
  • brown sugar
  • white sugar
  • seasonings (garlic powder, oregano, parsley, basil, thyme)
  • ground beef (optional)
  • italian sausage (optional)
You pretty much dump everything in the pot and stir it all up.

Cook your onions and ground beef (if you're using that) until they're nice and done. Then go ahead and add them to the pot too. Cover it up and let it simmer all day long. I'm serious about this. Stir it occasionally, but let it cook.

As for your lasagna rolls, it's pretty easy, and elegant looking. Cook your noodles till they're pretty much done. YOu don't want them cracking on you when you're trying to roll. Mix together your filling. Lay the noodles out on a rack and spoon some filling on each one. Roll them up like a sleeping bag and place them on your tray. I used a large baking pan. This is the point where you can freeze the rolls.

Or you can place them in your baking dish, cover them with sauce and cook them up!

And of course, smother with cheese.

LASAGNA ROLLS
Filling:
  • 1 large container ricotta cheese
  • 1 egg
  • 1/2 cup parmesan cheese
  • 2 cups mozzarella cheese
  • seasonings (parsley, pepper, salt)
Other things needed:
  • pasta sauce
  • 1 cup mozzarella cheese (for topping)
  • 10-12 cooked lasagna noodles
Mix together everything needed for the filling. Spoon some onto each cooked noodle and roll up like a sleeping bag. If freezing, place the rolls on a cookie sheet and place in freezer. When frozen, place them all in a ziploc bag.

To cook
: place some sauce in the bottom of your baking dish. Add the rolls, cover with sauce and then 1 cup of mozzarella cheese. Bake at 350 degrees for 30-40 minutes.

To cook from frozen
: Follow the regular cooking directions, but cover for 1st half of baking. Or pull the rolls out a few hours before you want to eat, and let them sit on the counter in yoru baking dish. Then just throw in the oven and cook normally.

SPAGHETTI SAUCE
  • 2 beef bouillon cubes
  • 1 chicken bouillon cube
  • 3 medium cans tomato sauce
  • 1 large can whole tomatoes
  • 1 can tomato paste
  • 1/3 cup brown sugar
  • 1/3 cup white sugar
  • 1 sauteed onion
  • 1 Tbsp garlic
  • 1 1/2 tsp EACH oregano, basil and thyme
  • 1 Tbsp parsley
  • ground beef (optional)
Dissolve bouillon in 1-2 cups water. Combine all ingredients in a large pot and let simmer all day. Add cooked italian sausages at the end (optional).

Thursday, July 23, 2009

Tin-Foil Fajitas

TIN-FOIL FAJITAS

I know, I post WAY too many fajita recipes on here, but really, fajitas are one of my all time favorite meals. And it's a go-to meal in my house. I always have the ingredients to make these in my kitchen. The meat often changes; chicken, pork, beef, none at all, but the concept is the same.

I always have peppers in it, squash and zucchini too. And I try to put onions in it, but Captain Jax just won't touch them! and then I end up with a full onion fajita, which isn't as great.

It's the sauce though that makes these fajitas. I'm serious. Try it just once with with sauce, it's has a slightly sweet flavor and is so great.

You can dice everything up like I do, or you can cut everything into strips. I don't like the strips, because I can't get good bites without everything falling out on me.

Combine everything (yes, I mean everything) in a bag and let it sit for a few hours, turning every once in a while.

Ok, you'll need your heavy duty tinfoil OR two layers of regular tinfoil. Grease it up a little bit with some oil, and then add some of the fajita mixture. Drizzle a little bit of sauce of the top, because it's so tasty.

Fold it up pouch style--fold two sides in, then the other two and fold it down. Grill it on medium heat for about 20 minutes. Feel free to turn it once or twice, so the bottom doesn't get too cooked.

Watch your hands when you open the packet, there's a lot of steam in there!!

Go ahead and build your fajita how you like it. What is wonderful about these packets if you can make one for each person and freeze any that don't get used (you can even freeze them after they're cooked, just thaw and throw back on the grill for a little while)

Tin-Foil Fajitas
  • 2 chicken breasts
  • 1 zucchini
  • 1 yellow squash
  • 1 pepper
  • 1/2 bottle Old World Fajita seasoning--yes THIS sauce
  • tortillas
  • assorted toppings like sour cream, cheese, guacamole
Dice up the veggies and meat and place in a baggie with about 1/2 a bottle of seasoning. Let it sit for a few hours, turning every once in a while to distribute the seasoning. Use either heavy duty foil, OR two layers regular foil. About 1'x1' is a good size for the foil sheets. Grease the foil with some oil and then spoon some of the mixture inside. Fold up each side, creating a little packet. Repeat until you're out of fajita mixture. You can now either grill or freeze.

To Freeze: Place packets in a ziplock baggie and write on the baggie what they are. Defrost completely before grilling.

To Grill: Place packets on grill heated to medium. Cook for about 20 minutes, turning occasionally (they will probably drip). Make sure the meat you use is cooked fully before serving.

(Linked up at: Bountiful Baskets Roundup, )

Monday, May 4, 2009

Waffles-Monday Mix Up

WAFFLES

We made these waffles for our easter breakfast, and they were wonderful! Reminded me of the waffles you'd get at a restaurant. What's I love about these waffles is you could make a larger batch and freeze the leftovers. Then you have a fast, easy breakfast whenever you want it.

Here's what you'll need to pull out:

In a bowl, combine together the mix, water, egg yolks and oil.

Beat it pretty good, and get the lumps out.

While you're working on that, put the egg whites in your mixer and beat them until stiff. It takes a while. But it's worth it! Don't let it get dried out though.


Then fold it into the pancake mix.

It gives it such a frothy look, I love it! and it made a HUGE difference in the taste. I couldn't believe I ate basic boring waffles before this.

I also heard that if you put then on a baking rack, it helps them not to get soggy, because the moisture is able to move away from the waffles. Well, I tried it, and it didn't make much of a difference. Let me know if you have any other tips to keep these crisp after you take them out of the iron.

WAFFLES
Recipe Courtesy of: http://recipesofacheapskate.blogspot.com
  • 2 1/2 cups pancake mix
  • 2 cups water
  • 3 eggs separated
  • 1/4 cup vegetable oil
Preheat your waffle iron. In a large bowl, mix together your pancake mix, water, egg yolks, and oil. While you're doing that, beat the egg whites until stiff in your mixer. Then fold the egg white's into your mix. Bake following your waffle iron's directions. Freeze any extra.

Wednesday, April 29, 2009

Strawberry Freezer Jam

STRAWBERRY FREEZER JAM

This move is taking a lot longer than I thought it would. Well, we've never really moved, so I wasn't aware how long things take to process. So I'll be here for a while longer, at least a couple more weeks, then we'll fly out to look at houses. Then we'll have to wait forever to close on a house. Then we'll drive cross country.

So I'll be here! :) I know you're all tickled pink!

Speaking of pink. . .red. . .strawberries are starting to come here! yay! so I made myself up some freezer jam.

You'll be needing:
  • Strawberries (I use 1 lb)
  • sugar
  • fruit pectin
Slice up your strawberries into chunks. You'll want about 2 cups worth. Or more. More would NOT hurt this recipe. In fact, it could give it even more of that strawberry flavor we all love.

Then pour 2 cups of sugar over it. and you could totally cut this sugar down. I cut it in half (the original recipe called for FOUR!!!! way too much sugar for me).

Mash those strawberries up good with your mother-in-law's pastry cutter. Don't tell her I used it ok? it just mashes things so well!

Don't pulverize the strawberries, you want some chunks left in there.

Boil your pectin and water, however the box tells you to do it. :) We do what the box says in situations like this.

Add it to the strawberries and stir it in good. It'll start setting up a looking more jam like. I let Captain Jax try some and he said it wasn't sweet enough. This is the man who could live off of brown sugar if I let him. He actually called me once, when he was watching our daughter K-girl, and first thing he said was "It's an emergency!" I, of course, started freaking out about our girl, and he said "um, actually, we're out of brown sugar.. . .will you pick some up while you're out?" He was in big trouble for that one! (and we had like 5 bags in the panty, he just didn't bother to look. . .silly husbands)

Divide your jam into some bags, and throw them in the freezer! Then, you can pull them out when you want strawberry jam in the middle of winter, and keep it in a jar in your fridge.

STRAWBERRY FREEZER JAM
Recipe courtesy of: http://recipesofacheapskate.blogspot.com
  • 2 c. crushed strawberries
  • 2 c. sugar
  • 3/4 c. water
  • 1 box Sure Jell fruit pectin
Thoroughly mix fruit and sugar in large bowl, let stand 10 minutes. Mix water and fruit pectin in small saucepan, boil 1 minute, stirring constantly. Remove from heat and stir in fruit. Let it sit for a little bit, then divide into bags and store in the freezer.

Tuesday, March 24, 2009

Chicken Mix--Monday Mix Up

CHICKEN MIX

First, I want to say that my pup is doing great. She got the staples taken out of her side, and the vet said it looked like everything healed perfectly! yay! And my neighbor, was very apologetic about her dog (a chow, which I've heard often bite with no warning) and paid for our vet charges.

We're happy, and my Indy puppy is even happier to go on walks again. But then yesterday, we got some bad news. My dear hubby Captain Jax had applied for a promotion, and was a shoo-in. As in the manager deciding who got the position had told him previously (about 2 months ago) that the next store (He is an assistant manager at Gamestop) would be his. He'd finally be a manager, after 3 years of waiting and working for it!!!

And then she gave it to someone else. He's pretty bummed about it (as am I) since she told him it would be his. *sigh* that's life for ya ain't it?

Anyway, on to our MONDAY MIX-UP!!! (On Tuesday. . .again)

We're making a basic chicken mix, which has a lot of potential. Here's what you'll need:
  • 12-14 chicken breasts
  • 4 carrots
  • salt
  • pepper
  • parsley flakes
  • dried basil leaves

Throw everything into a pot of cold water (4 qts to be exact). Let it start boiling, then turn it down and simmer it for about an hour, until the chicken's done.

Drain out the broth (feel free to save it and freeze it for later uses)

shred up your chicken, and mix everything together nicely.
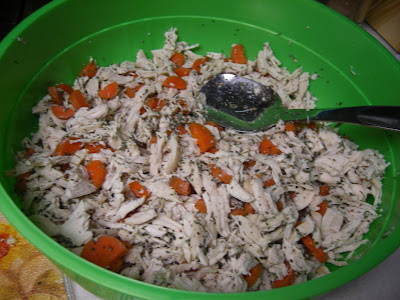
Mmmm. . . . .

Divide the mixture into 2 cups per bag, since that's the amount that's needed for most recipes. Label it and freeze it for up to 6 months.

CHICKEN MIX
Recip courtsey of: recipesofacheapkate.blogspot.com
  • 12-14 chicken breasts (boneless, skinless)
  • 4 qts cold water
  • 4 carrots, cut up
  • 2 tsp pepper
  • 4 tsp salt
  • 2 tsp dried basil
  • 3 Tbsp parsley flakes
Combine everything in a large pot. Cover and bring to a boil. Then, reduce the heat to a simmer and let it cook for about an hour, until the chicken is cooked. AFter the chicken is done, strain the broth out (you can save it for later uses). Shred up the chicken and mix it together with the carrots. Add about 1/4 cup of the broth, to help the chicken not dry out. Divide into baggies of 2 cups each and freeze for up to 6 months.

Now, my older sister reads my blog. She doesn't comment (but she should!!) but she thought of me as she made Chimi's a few nights ago and she took pictures for me! She rocks.

This meal though, when I saw it, I thought "This would go perfectly with my chicken mix!!" So here we go!


Take 1 bag of your chicken mixture, and mix it together with some sauteed onions and peppers. Feel free to add some cheese. We all know how I feel about cheese.


Take 2 packages of crescent rolls and roll them out into rectangles. (2 triangles per square) Make sure you pinch the seams together, otherwise you might have some difficulty cleaning your pan later on. Spoon some salsa onto each one.

Add some chicken mixture and roll up from the short end. It is more or less just folding the edges up on the rectangles, and pressing the seam into itself (place seam side down on baking sheet). Don't worry too much about the ends, just kind of gently push together a little. Sprinkle with some more cheese (You might have to push it down a little bit to have it stick)

Bake for about 20 minutes at 350degs.


Top with sour cream and green onions.

Or don't. My sister didn't (I bet she didn't have any in her fridge :) )

CHIMI'S
Recipe Courtesy of: Recipesofacheapskate.blogspot.com
  • 3 Tablespoons Oil
  • 1 small onion (chopped)
  • 2 cups Chicken Mix
  • 2 cups shredded cheese
  • 2 (8-count) cans crescent rolls
  • 1/2 cup salsa
  • 1/2 cup sour cream
  • 1/4 cup chopped green onions
Heat oil in skillet and cook onion and pepper and shredded meat in skillet. Remove from heat and stir in 1 cup cheese. Unroll crescent rolls, and separate into 8 rectangles (using 2 triangles for each rectangle)- be sure to pinch seams together, or they will leak out later. Spread 1 tablespoon salsa onto each rectangle (stay about a 1/2 inch from edges if you can) Spoon meat and cheese mixture onto the rectangles and roll them up from short end. It is more or less just folding the edges up on the rectangles, and pressing the seam into itself (place seam side down on baking sheet). Don't worry too much about the ends, just kind of gently push together a little. Sprinkle with remaining cheese (I found this to be easier if you kind of pat the top of the chimichangas a little so the cheese will stay on the top and not fall onto the baking sheet). Bake at 350 for about 20 minutes (until golden brown). Top with sour cream and green onions.

And I bet these would freeze well before you cook them too! then just pull out and let defrost and cook as normal.